Why Do People Use Fingerboard Tapes?

Apply violin fingering tapes for a beginner, its important to know where to place your fingers for each of the notes because the fingerboard doesn’t have any indication of where the notes are and it will be very frustrating to try to find them without a guide of some kind. Most people use tapes for the first year or two of playing. After that time, you should have developed ear skills and muscle memory that will let you know where the notes are without tapes.
What You Need
 All you need is a pencil, a ruler, and the tapes. You can use special violin fingerboard tapes, or simply stickers or printer labels. Even a piece of paper, cut thin and taped on the violin would work. The fingerboard tapes do need to go all the way across the fingerboard, making it 100% clear where the note is. You will also need to know how to tune and own a tuner.
Tune the Violin
The violin strings must be in tune before applying the tapes. Tune all the strings before moving on to the next step for applying tapes.
If You need help tuning the violin, you may refer to This Tuning Guide or Contact Ms. Laura to schedule an online violin lesson to tune the violin.
Measure It Out
Look below for the measurements for your size of instrument. The rest of this example is for taping a FULL SIZED Violin. Make sure to adjust the measurements for smaller violins (scroll down to see the list).
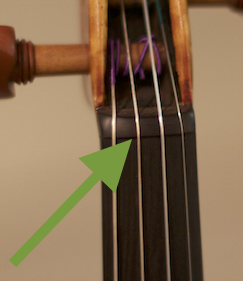
 First you will measure it out from the nut. That’s the raised up ebony part where the string crosses over into the peg box. Make sure you measure from the inside of the nut, on the side of the fingerboard, not the side that goes into the peg box.
You will have to hold the ruler over the nut unless the ruler starts measuring from its edge.
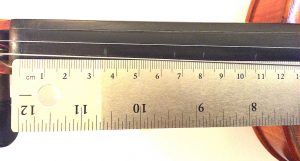
This example is for putting tapes on a full size violin, so make my first mark at 1 3/8 inches or 35 millimeters. Put the ruler at the edge of the nut and measure out 1 3/8 inches or 35 millimeters. Make a small mark onto the fingerboard with the pencil (this will be covered with the tape later, or you can easily erase it with no damage to the violin. Continue to measure forward to 2 5/8 inches or 66 millimeters and make the 2nd spot. The 3rd spot is at 3 1/8 inches or 80 millimeters. The final mark should be made at 4 1/8 inches or 106 millimeters.

Place the Stickers on the Fingerboard
Peel the back off the tape and slide it under all four strings. If its hard to get it under all of them, you can feed it under the strings by starting at the bridge and sliding up. Make sure the tape is perfectly horizontal with the bridge, not slanting to one side or the other. Don’t press and stick the tape all the way down until you have moved on to the next step and checked that it is correct with a tuner.


Check the tuning to see how you did. Use a tuner to see if the marks are at the right spot. After tuning the A string precisely, when playing on the A string with the first finger on the first tape, it should show the pitch B on the tuner. The tuner should show that the note B is in tune, if it’s not, move the tape slightly. The second finger should be a C#. The third finger should be a D. The 4th finger should be an E. If the tuner shows that one or more of the tapes does not make the correct pitch, feel free to move it slightly so the tuner shows it in tune. There are many small factors that can make a pitch higher or lower including the set up of your violin, your playing technique, and the sensitivity of your tuner.

Measurement for the common sizes:
Full Size Violin (4/4)
Tape 1 = 35mm or 1 3/8 inches
Tape 2 = 66mm or 2 5/8 inches
Tape 3 = 80mm or 3 1/8 inches
Tape 4 = 106mm or 4 1/8 inches
3/4 Violin
Tape 1 = 32mm or 1 1/4 inches
Tape 2 = 61mm or 2 3/8 inches
Tape 3 = 75 mm or 2 7/8 inches
Tape 4 = 100 mm or 3 7/8 inches
1/2 Violin
Tape 1 = 28mm or 1 1/8 inches
Tape 2 = 54mm or 2 1/8 inches
Tape 3 = 68mm or 2 5/8 inches
Tape 4 = 91mm or 3 5/8 inches
1/4 Violin
Tape 1 = 25mm or 1 inch
Tape 2 = 48mm or 1 7/8 inches
Tape 3 = 60mm or 2 3/8 inches
Tape 4 = 79mm or 3 1/8 inches